Tutorial 2 ~ Management Field
Introduction[edit | edit source]
To start, I'll begin explaining a bit on how things are structured inside the editor.
After you download it, extract it, go to the editor folder and open LuaSTG Editor.wx.wlua file. For more instructions, check the main page on this wiki.
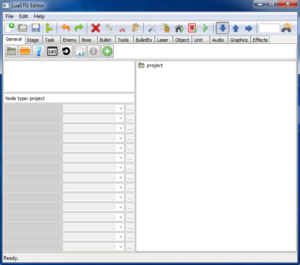
Once you open it, a blank space is shown and you can see some tabs, some nodes, and an empty "project" folder.
Now, now, first of all, we need to create a new project on the program so that we can start doing some things. You have three options to create a new project: go to the "File" bar and click on "New...", the other option is to click the blank page with a plus symbol (![]() ), or press Ctrl+N.
), or press Ctrl+N.
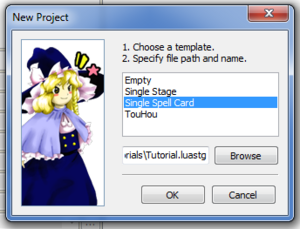
Next, you will see a dialog box pop-up with the following options:
| Template | Usage |
|---|---|
| Empty | This will create a blank/empty project |
| Single Stage | This will create a base for a single stage-only (no boss) project |
| Single Spell Card | This will create a base for a single spell card to be created and a stage that skips directly into it |
| TouHou | This will create a project complete with a base for every stage in every difficulty |
| File path | Choose the destination the project will be saved on. If you only write a name, it will be saved on the same folder as the editor |
I will be using the Single Spell Card template to begin with. So choose that and create the project.
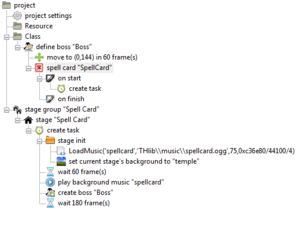
As you can see on the left, in the Management Field, many nodes were added. (if you aren't understanding what these terms are, check the general concepts page).
To start, at the top of it, inside the project folder, the first thing that appears is the project settings (![]() ). Selecting it, you can see some options at the left side, those are the node parameters. You can change the game name, the author, and if the game will allow stage and spell card practice.
). Selecting it, you can see some options at the left side, those are the node parameters. You can change the game name, the author, and if the game will allow stage and spell card practice.
However, our focus here is something else. Select the spell card node (![]() ) and click on debug spell card (or Shift+F6) (
) and click on debug spell card (or Shift+F6) (![]() ).
).
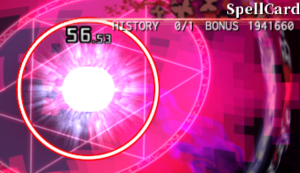
You should be seeing now a Nue-like spirit floating around, doing nothing. This is the default sprite LuaSTG adopts when your boss doesn't have any image linked to it. Anyway, you can also see LuaSTG also comes with 3 defaults players — Reimu, Marisa and Shalimar. Reimu and Marisa is your usual shot type, while Shalimar features 3 types, that you can alter by pressing Shift and Z at the same time. Anyway, once you shoot for a while, the spell card ends (or if you time it out).
You have probably seen that the spell card node has some parameters that you can change, but we will see that later.
Proceeding, let's try spawning some bullets!
Close the game. Next, go back to the management field and select the pre-set create task (![]() ) node inside of the spell card node. Then, go to the "Task" tab and insert the repeat node (
) node inside of the spell card node. Then, go to the "Task" tab and insert the repeat node (![]() ) as a child node (
) as a child node (![]() ) of the create task one.
) of the create task one.
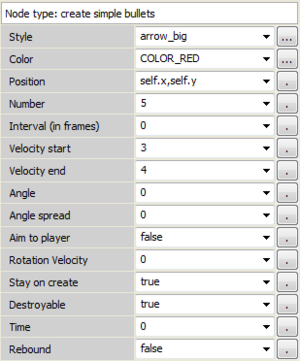
The process I just described was that the spell card divides itself in "tasks". Currently, there is only one task, that has a repeat node inside of it, which means that the first (and only) task it'll perform is the one that has contents inside of it. You can also alter the interval of frames it'll take to repeat the action, and how many times, but I'll let it as infinite for now. Now, select the repeat node you just inserted, go to the "Bullet" tab, and insert as a child the create simple bullets node (![]() ). On the left side of the editor, once again in the node parameters screen, you'll see a list of options you can choose inside of the node. I'll describe what each thing does for you:
). On the left side of the editor, once again in the node parameters screen, you'll see a list of options you can choose inside of the node. I'll describe what each thing does for you:
| Style | Bullet type |
| Color | Color of the bullet |
| Position | Where the bullet will spawn (in this case, self.x and self.y are the boss' coordinates) |
| Number | How many bullets |
| Interval | Interval in frames on how much time it'll take for bullets to spawn |
| Velocity start | First bullet velocity |
| Velocity end | Last bullet velocity |
| Angle | Angle that the bullet will be shot |
| Angle spread | Space between each bullet (angle spread) |
| Aim to player | If the bullet will be aimed at the player |
| Rotation velocity | Determines the bullet rotation (spin) |
| Stay on create | Exist when created |
| Destroyable | If the bullet can be destroyed (e.g. by bombs) |
| Time | Frames the bullet will stay still before movement or doing the determined action |
| Rebound | If the bullet will ricochet in the game's frame/hud (only left, right and upwards) |
Try changing some values, trying some things, then debug the spell card again.
For now, this is it. See ya in the next one!
Overlook[edit | edit source]
We've seen the basics and the structure on how the editor works, made a simple and crude pattern, and understood some things on the engine itself in this tutorial. Try doing some changes to the things you made and see what happens!
| |||||||||||||||||
