Tutorial 1 ~ Downloading and Starting a Project in LuaSTG (Editor) (Legacy)
Part 1 - Setup[edit | edit source]
Welcome to the first tutorial on the LuaSTG editor. First of all, let's start by downloading it, of course.
Since we're going to use the editor you gotta download Lua for Windows first.
After that, download the LuaSTG Editor here and extract it somewhere (be sure to put in a folder, of course!).
After that, navigate to ![]() Editor
Editor ![]() folder and open the LuaSTG Editor.wx.wlua file.
folder and open the LuaSTG Editor.wx.wlua file.
Part 2 - Your First Project[edit | edit source]
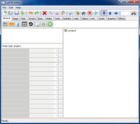 After that, a window like the image on the side should appear (although covering the entire screen).
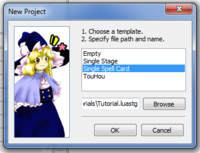 Now, let's start with making a new project by clicking the "New Project" icon (
![]() ) and selecting a folder to store our files.
) and selecting a folder to store our files.
(Click on "Single Spell Card" for now).
Alright, alright! Now, our "management field" should be like this: 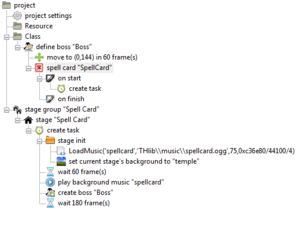
How about we click on "Debug Spell Card" (![]() ) and see how it looks?
) and see how it looks?
This'll be the result: 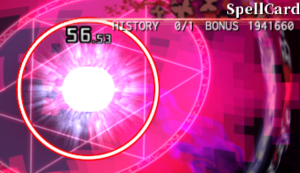
As you can see, it's a simple boss, that doesn't shoot anything, and has simple THlib (more to be told about it later) assets. But, you see that it's simple as this to make a working little piece of "Spell Card" (atleast the basics).
Now, how about we make it shoot a few bullets?
Go back to the "management field" (Be sure to close the game! Otherwise you won't be able to save the changes made in the editor) and click on the little clock icon (![]() ) named "Create task" and we'll start by there.
) named "Create task" and we'll start by there.
As you can see, there are 3 arrows in the bar upwards the management field (![]() ), and each of them represent "where to put the following node":
), and each of them represent "where to put the following node":
![]() for "Insert After";
for "Insert After";
![]() for "Insert Before";
for "Insert Before";
and ![]() for "Insert as Child".
for "Insert as Child".
For now, let's call them Up,Down, and Child.
Now, select Child and then go to the Task tab in the tab lists (![]() ).
).
After doing that, click on Repeat and you'll see that that's on the management field as a child of the pre-set "Create Task" node.
Now, go to the Bullet tab in the tab lists and click on Create Simple Bullets (![]() ) icon, and you'll see that also went as a child of the Repeat node we put as a child of the "Create Task" node before.
) icon, and you'll see that also went as a child of the Repeat node we put as a child of the "Create Task" node before.
Click on that, and you'll see in the "Node specifications" panel (at the side) a few parameters you can adjust:
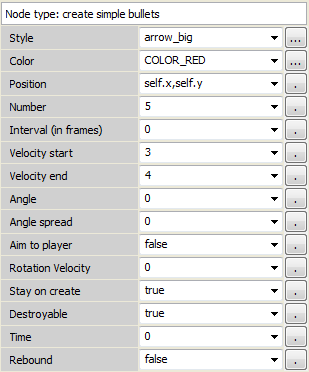
Here's a list describing the things you can alter here:
| Style | Bullet type |
| Color | Color of the bullet |
| Position | Where the bullet will spawn (in this case, self.x and self.y are the boss' coordinates) |
| Number | How many bullets |
| Interval | Interval in frames on how much time it'll take for bullets to spawn |
| Velocity start | First bullet velocity |
| Velocity end | Last bullet velocity |
| Angle | Angle that the bullet will be shot |
| Angle spread | Space between each bullet (angle spread) |
| Aim to player | If the bullet will be aimed at the player |
| Rotation velocity | Determines the bullet rotation (spin) |
| Stay on create | Exist when created |
| Destroyable | If the bullet can be destroyed (e.g. by bombs) |
| Time | Frames the bullet will stay still before movement or doing the determined action |
| Rebound | If the bullet will ricochet in the game's frame/hud (only left, right and upwards) |
Now, why don't you try debugging the Spell Card again and see what it does?
Overlook[edit | edit source]
Today we learned how to setup the LuaSTG Editor properly and learned how to make a simple Spell Card. Tingle around with some of the parameters or other nodes and see what you can do! Good luck, and see you next time!
| |||||||||||||||||